Skip Prerequisites, Web and LPAR2RRD tabs in case of configuring
Virtual Appliance,
Docker or a
Container
Follow installation procedure for your operating system platform
Implementation is agentless, all data is gathered from CloudStack API.
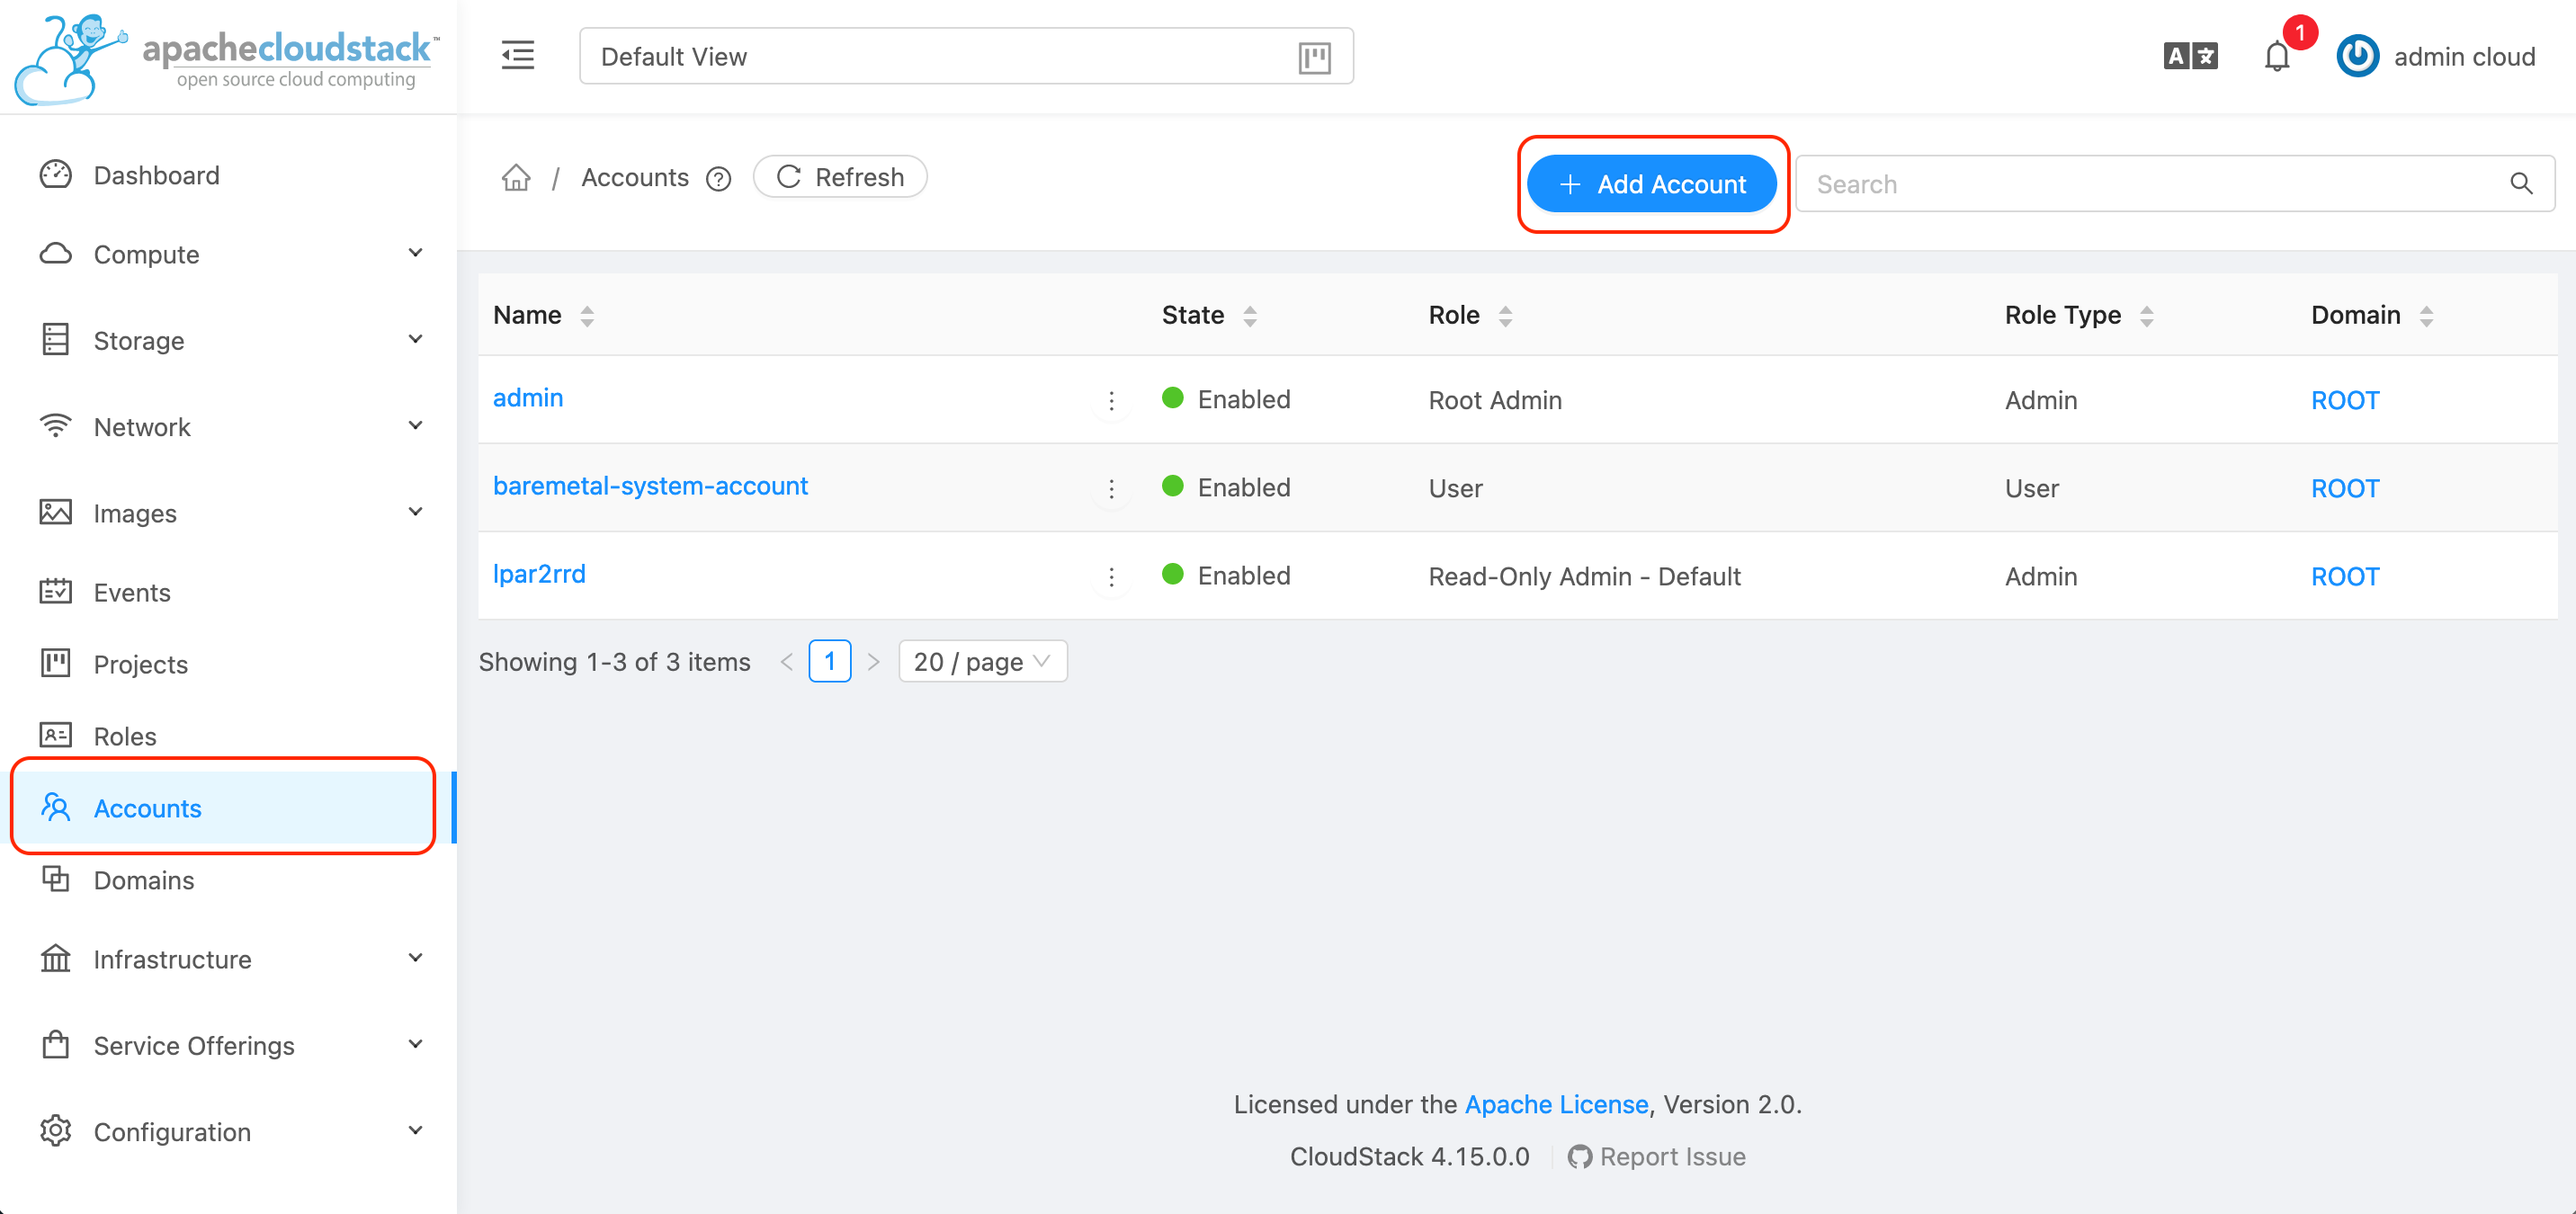
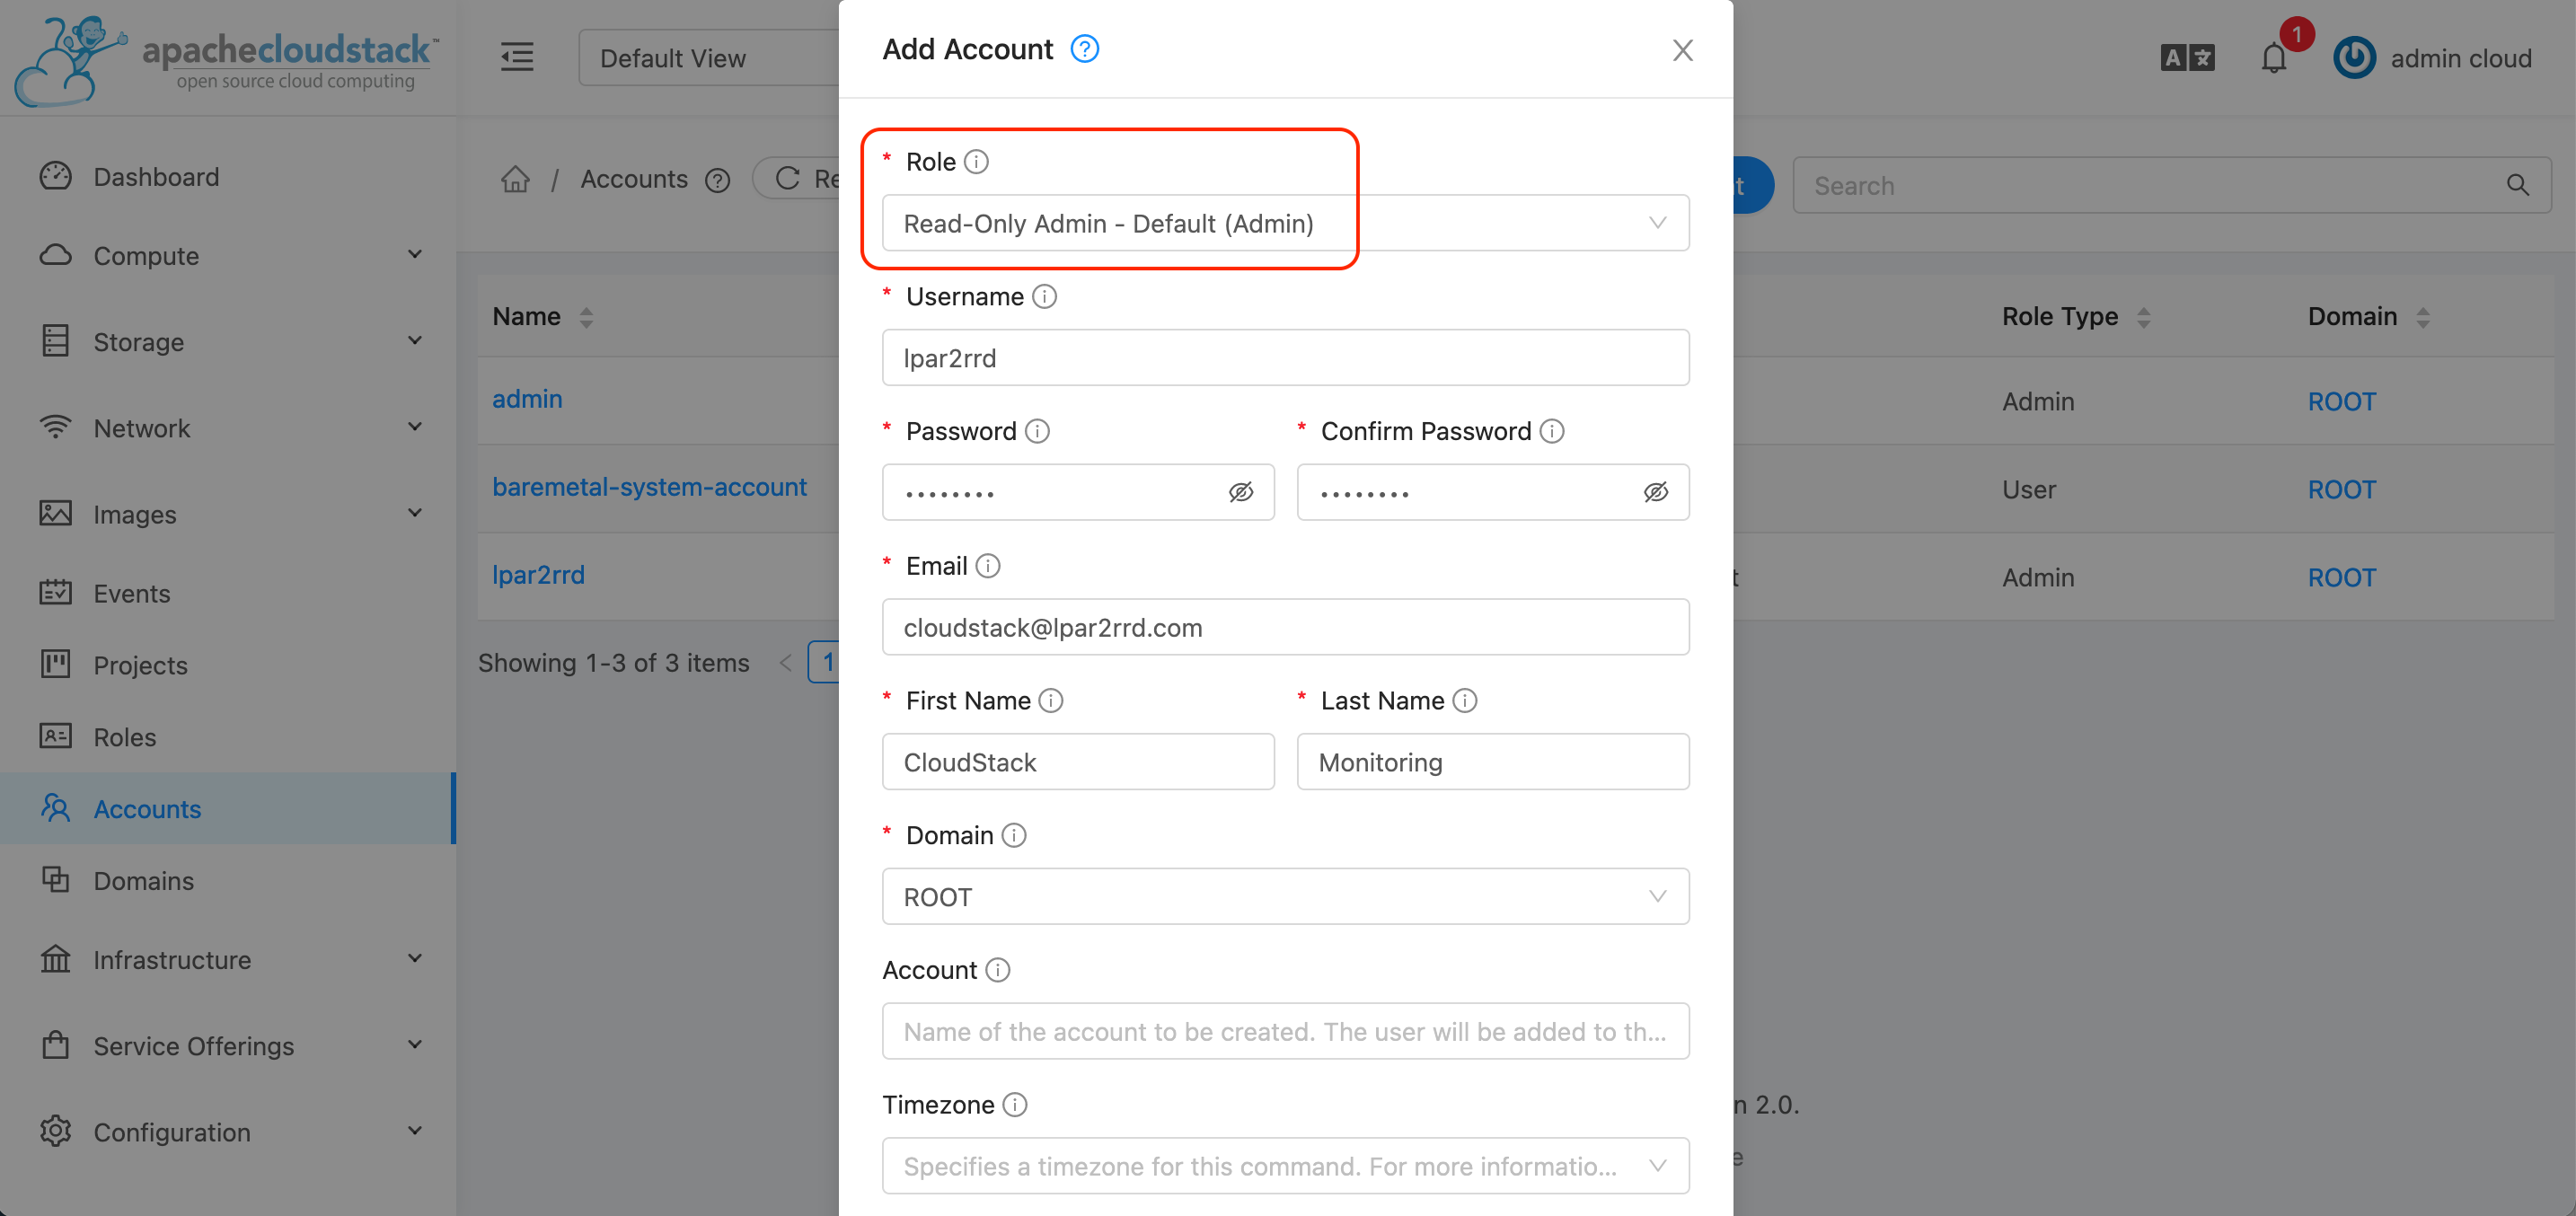
Create a lpar2rrd user with read-only admin role
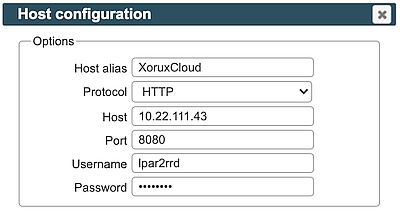
Configure CloudStack in LPAR2RRD
-
LPAR2RRD UI ➡ Settings icon ➡ Apache CloudStack ➡ New
- Make sure cron job for CloudStack is in place (upgrade script might do it for you automatically)
Skip this step if you install the Virtual Appliance - it is already taken care of.
$ crontab -l | grep "load_cloudstack.sh"
$
Add following lines to crontab if necessary
$ crontab -e

# Apache CloudStack support
0,20,40 * * * *  /home/lpar2rrd/lpar2rrd/load_cloudstack.sh > /home/lpar2rrd/lpar2rrd/load_cloudstack.out 2>&1
- Wait 30 minutes and then go to the web UI: http://<your web server>/lpar2rrd/
Use Ctrl-F5 to refresh the web browser cache.
Install LPAR2RRD server (all under lpar2rrd user)
-
Download the latest LPAR2RRD server
Upgrade your already running LPAR2RRD instance.
- Install it:
# su - lpar2rrd
$ tar xvf lpar2rrd-7.XX.tar
$ cd lpar2rrd-7.XX
$ ./install.sh
$ cd /home/lpar2rrd/lpar2rrd
- Make sure all Perl modules are in place
cd /home/lpar2rrd/lpar2rrd
. etc/lpar2rrd.cfg; $PERL bin/perl_modules_check.pl
If there is missing "LWP::Protocol::https" then check this docu to fix it
- Enable Apache authorisation
umask 022
cd /home/lpar2rrd/lpar2rrd
cp html/.htaccess www
cp html/.htaccess lpar2rrd-cgi
- Schedule to run it from lpar2rrd crontab (it might already exist there)
$ crontab -l | grep load.sh
$
Add if it does not exist as above
$ crontab -e

# LPAR2RRD UI
0,30 * * * * /home/lpar2rrd/lpar2rrd/load.sh > /home/lpar2rrd/lpar2rrd/load.out 2>&1
Assure there is just one such entry in crontab.
- You might need to add lpar2rrd user into /etc/cron.allow (Linux) or /var/adm/cron/cron.allow (AIX) if 'crontab -e' command fails
Allow it for lpar2rrd user as root user.
# echo "lpar2rrd" >> /etc/cron.allow
- Assure you have a cron job for AWS is in place (upgrade script might do it automatically)
Skip it on the Virtual Appliance, it is already there.
$ crontab -l | grep "load_aws.sh"
$
Add it if it does not exist like above
$ crontab -e

# AWS support
0,20,40 * * * *  /home/lpar2rrd/lpar2rrd/load_aws.sh > /home/lpar2rrd/lpar2rrd/load_aws.out 2>&1
-
Initial start from cmd line:
$ cd /home/lpar2rrd/lpar2rrd
$ ./load.sh
- Go to the web UI: http://<your web server>/lpar2rrd/
Use Ctrl-F5 to refresh the web browser cache.
Troubleshooting
-
If you have any problems with the UI then check:
(note that the path to Apache logs might be different, search apache logs in /var)
tail /var/log/httpd/error_log             # Apache error log
tail /var/log/httpd/access_log            # Apache access log
tail /var/tmp/lpar2rrd-realt-error.log    # STOR2RRD CGI-BIN log
tail /var/tmp/systemd-private*/tmp/lpar2rrd-realt-error.log # STOR2RRD CGI-BIN log when Linux has enabled private temp
- Test of CGI-BIN setup
umask 022
cd /home/lpar2rrd/lpar2rrd/
cp bin/test-healthcheck-cgi.sh lpar2rrd-cgi/
go to the web browser: http://<your web server>/lpar2rrd/test.html
You should see your Apache, LPAR2RRD, and Operating System variables, if not, then check Apache logs for connected errors